Renovating your home can feel overwhelming, especially for first-time homeowners unfamiliar with the process. Having strangers working in your home for an extended period might seem daunting. However, with CRG Remodeling, you can rest easy. For over a decade, we’ve been trusted by homeowners to bring their visions to life, and we take immense pride in our reputation for honesty, clarity, and quality work.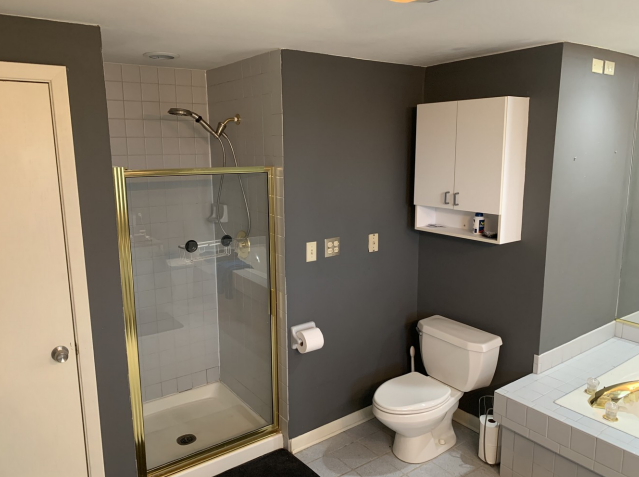
Step 1: Evaluation of the Project
The renovation journey begins with an initial estimate meeting. During this evaluation, we discuss your goals for the project, identify the extent of labor required, and highlight potential obstacles that could arise. Thanks to our extensive experience, we often catch potential issues before the project even begins, helping to avoid unexpected costs and delays.
Step 2: Reviewing and Accepting the Proposal
Once we’ve defined the scope, you’ll receive a detailed proposal. This includes:
- Labor cost estimations
- Installation material costs
- A ballpark range for finish materials like bath fixtures, faucets, cabinets, countertops, tile, flooring, and light fixtures
You’ll have the freedom to select these finish materials to match your style and budget. Transparency is key, and we ensure that all costs and options are clearly laid out.
Step 3: Scheduling Your Start Date
After approving the proposal, we’ll schedule your project’s approximate start date. Two weeks prior, we’ll provide an updated timeline. Whenever possible, we prioritize completing one project before starting another to ensure dedicated attention and a smooth process.
Step 4: Demolition Day
Demolition kicks off on the first day at your home. To prepare:
- Remove all personal items from the renovation area and store them in boxes.
- Take down pictures from adjacent walls and shelving to protect them.
We take every precaution to minimize dust and debris, including using tarps, plastic coverings, and plastic walls. All demolition materials are promptly removed and hauled to the dump in our trailer, eliminating the need for an unsightly dumpster. If there are items you’d like to preserve, let us know beforehand.
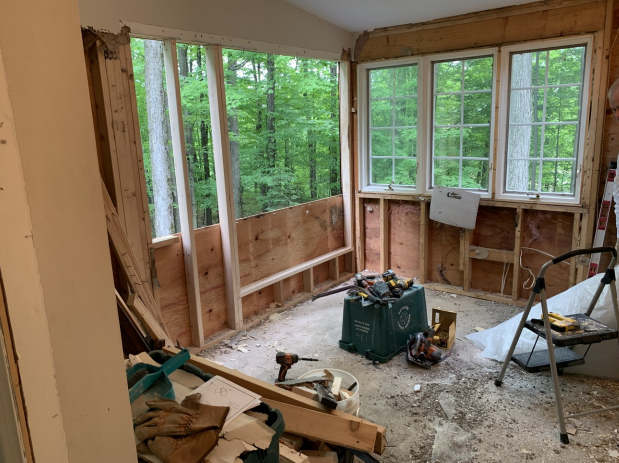
Step 5: Electrical and Plumbing Work
Once demolition is complete, we address electrical and plumbing needs. This stage is critical for determining requirements for appliances, lighting, and plumbing fixtures. Pre-planning is essential here, as changes made after drywall installation can affect both the timeline and budget
Step 6: Drywall and Painting
With electrical and plumbing work finalized, we move on to drywall and finishing. This is often the messiest part of the process due to sanding dust, but we take steps to minimize the impact on your home.
Step 7: Installation of Fixtures and Finishes
Next comes the installation of cabinets, fixtures, tile, flooring, molding, appliances, and more. Countertops, hardwood floors and custom shower glass are typically handled by specialized companies, and we coordinate these installations seamlessly.
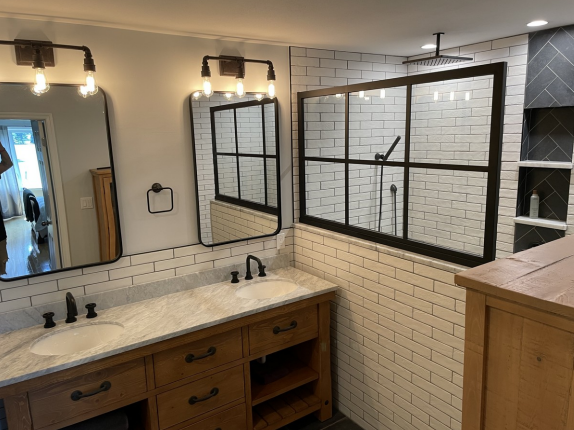
Step 8: Final Touches
After the major installations, we complete any final touches, such as touchups and hardwood floor refinishing. These finishing steps ensure your renovated space looks polished and ready to enjoy.
What to Expect and How We Mitigate the Unexpected
Renovations can sometimes bring surprises, such as unforeseen structural issues or outdated wiring. At CRG Remodeling, we’re proactive in identifying potential challenges early and maintaining clear communication throughout the process. With careful planning and our commitment to quality, we make the renovation experience as stress-free as possible.
Choose CRG Remodeling for your next project and experience the difference of working with a trusted partner. Let us turn your vision into reality—one step at a time.
